Go Tuck Yourself: Finding a Delivery Style That Works for You


Hear more about this subject and other curling topics from Jonathan Havercroft on Rocks Across the Pond: A Curling Podcast available on iTunes, Google Play, Stitcher, and TuneIn

On the latest episode of our podcast we had our first guest: Mark Ngo from Oklahoma Curling Club. We asked Mark if he had any questions about curling for our coaching segment, and it turns out he had a lot! I think his questions boil down to one big issue: does a curler’s delivery have to imitate the curling manual?
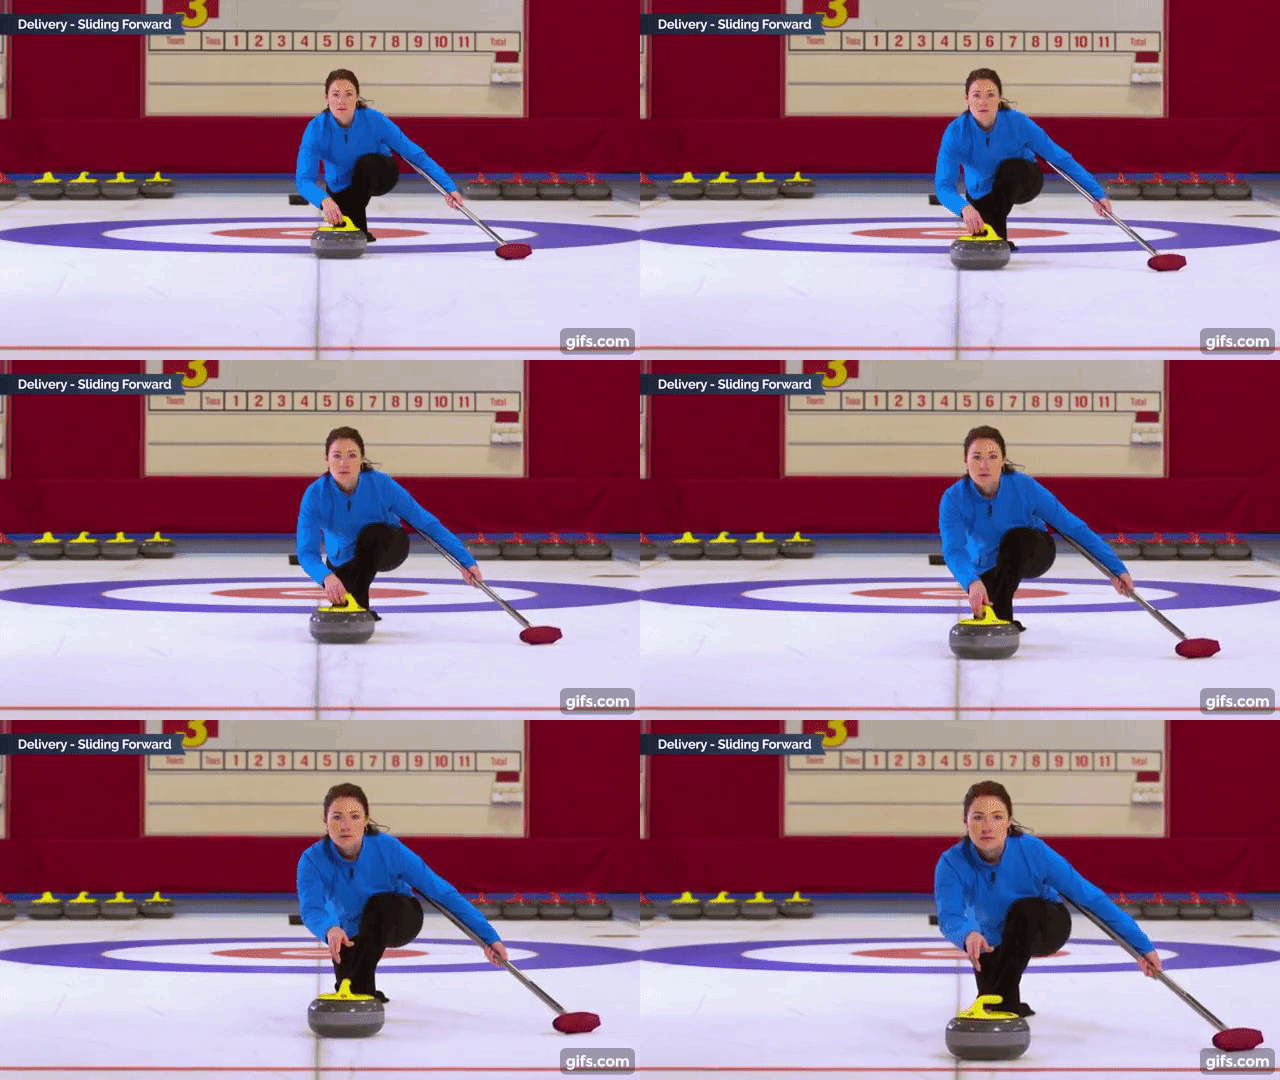

The by-the-manual curling delivery

Anyone who has taken a Level 1 curling coaching course (regardless of the country) knows that there is a standard way of teaching the curling delivery: no back-swing, flat foot slide, broom under the arm at a 45 degree angle, toe of sliding foot turned out, etc. Anyone who has watched a curling match on TV or walked into any curling club on the planet will quickly notice that very few curlers from the beer league to PyeongChang throw the way they tell us to in the coaching course.

So what gives? When should we listen to the Level 1 curling course guidelines, and when should we ignore them?

The short answer is that the level 1 curling course teaches a standard delivery aimed at getting a novice curler to throw the stone as quickly as possible with as technically sound a delivery as possible in as short a time as possible. So it is best when coaching and playing to at least start with that delivery.

But I prefer to think of these more as delivery guidelines than hard or fast rules. Many people will not be able to get into the prescribed position simply because of body shape, size or flexibility. Some people might get into a very different slide position than the one the manual prescribes.

To pick one example Mark raised: is the toe-tuck delivery bad? The toe-tuck delivery is not covered in any coaching manual, but it is relatively common amongst elite curlers, especially curlers from Manitoba. A lot of world champions have used the toe-tuck delivery. So obviously it can be that bad.

Mark Ngo doing the Okie Toe-Tuck

Curling manuals do not teach the tuck delivery because it is associated with knee injuries. By putting more body weight on the toe of the foot and bending the knee to a more extreme angle, the toe tuck puts more strain on the knee ligaments and can lead to more knee injuries.

I’m not a doctor or a physiotherapist, so I can’t answer the question of whether or not the tuck is actually more dangerous. If, however, the toe tuck delivery hurts your knee when you do it, then the delivery probably isn’t for you. But let’s say your knee doesn’t hurt, then why might you want to do it? Most people toe tuck to get lower to the ice. In the conventional flat foot slide, turning the sliding foot out creates space in the hips that allows the body to drop to the ice, which in turn helps with the balance of the slide (lower center of gravity) and the aim (lowers the eye to behind the stone).


Jeff Stoughton's classic tuck delivery

The toe tuck does this too, but instead uses the ankle and knee joint as well as the hip joint to get the body into a low sliding position. How low a curler is able to get in either sliding style is going to depend on how flexible they are in each of those joints. In terms of the slide itself, the tuck also has the advantage of having less surface area touch the ice, making for less friction, and so a faster slide over all.

The big disadvantage with a tuck slide is that the curler is more likely to fishtail (i.e. the trailing leg can drift off to one side or other) which in turn can throw the curler offline. So if you do use a tuck slide you need to have someone check to make sure you are not creating other problems with your delivery.

It is the same principle for the other questions Mark asked about broom placement and the trunk lift as well as any other delivery characteristic that deviates from what the manual teaches.
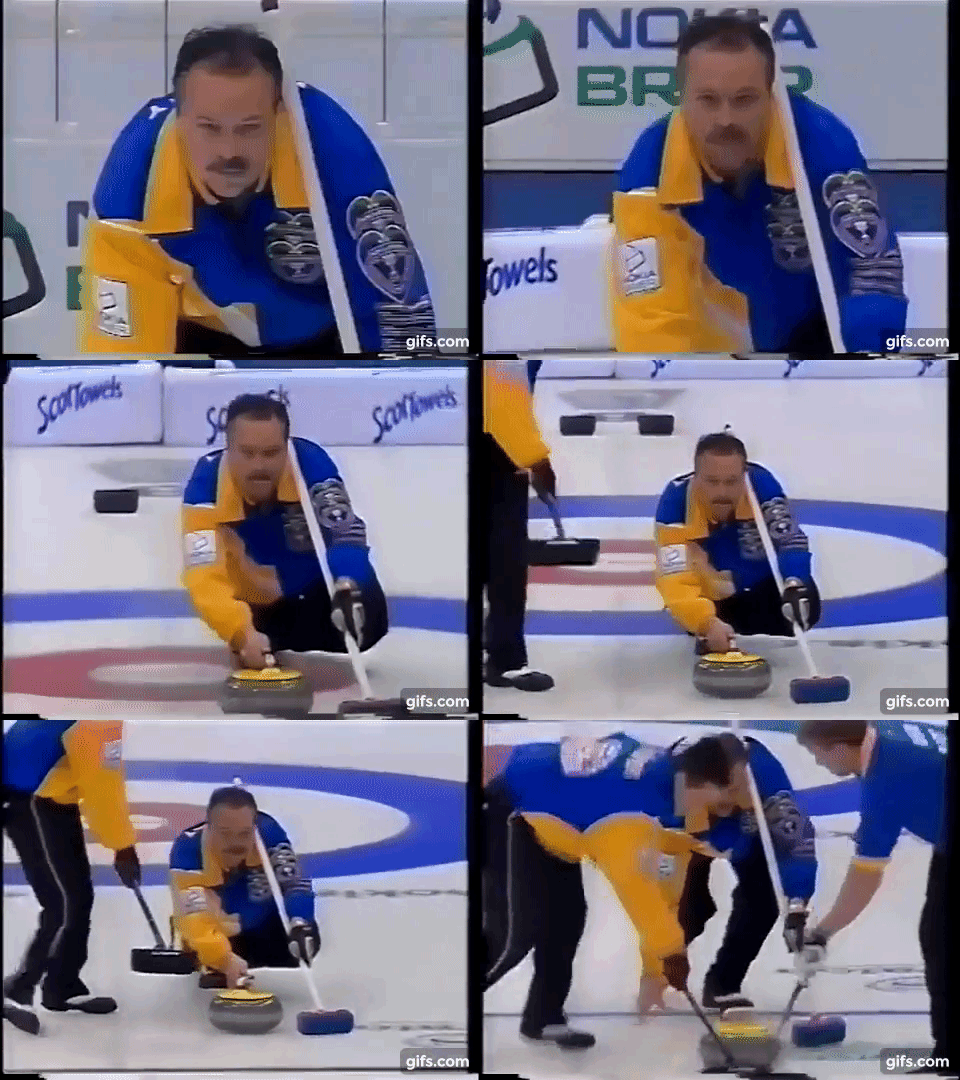

Hard to argue with Randy Ferbey's six Briers

There is nothing wrong with delivering a stone that way, but the more a delivery deviates from the standard delivery, the more likely a curler is to introduce a problem into their delivery that will negatively impact how the stone is thrown. But very few people, especially those who take up curling later in life, have the flexibility and balance to slide exactly how it is taught in the curling manual. This is where the coach needs to adjust what is taught in the manual to fit the needs and abilities of each curler.

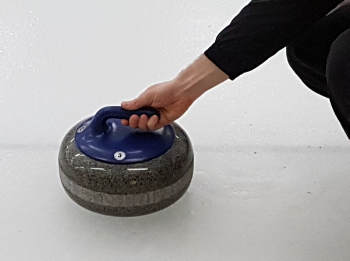
 

Throwing a Positive Release


When watching curling on TV, you may hear players talk about throwing either a “positive release” or a “soft release.”

One thing that differentiates the average club curler from a competitive curler is the quality of their release. A problem with the release is often the first fault many players notice in their own delivery.  This is because a release problem (such as “dumping” the out turn or “starting” the in-turn) is the most obvious reason for missing the target from the skip’s perspective.

A player misses a shot and they ask their skip, “what happened?” All too often the skip will respond, “it looked like you were online until your release.”

This raises a number of questions:

  1. What causes someone to have a bad release?
  2. How can we fix a bad release?
  3. What is the difference between a "positive" release and a "soft" release?
  4. Why does it matter?

Let’s consider these issues is order:

What causes a bad release?

By bad release simply means the player is doing something as they let go of the stone that causes it to deviate from the line of delivery. The two most common release faults are the tendency to set an out-turn wide of the line of delivery (the “out-turn dumps”) and to set an in-turn narrow of the line of delivery (“starting” the in-turn).

The out-turn dump will curl less than a clean release and be wide of the target. The started in-turn will curl more than a clean release and be narrow of the target. Both faults are going to lead to a lot of missed shots.

How to fix a bad release

The problem is the release is the symptom of the delivery fault, not the cause in a majority of the cases of a bad release. Often the reason a player is doing something strange on release is to compensate for a problem earlier in the delivery.

So if your skip is complaining about a bad release, step one is to find a certified curling coach to look at your whole delivery and to identify what the actual cause is. The possible causes are numerous, and could be the topic of their own blog post.

Let’s assume you’ve worked with a coach to improve your balance, the timing of your delivery, and your line of delivery (all potential areas that might be causing the bad release). After all those areas have been addressed then there are four steps to the actual release that need to be looked at:

  1. The grip (established during the set-up phase)
  2. Delivery arm position during slide phase
  3. Initiating the curl
  4. Release and follow through

The grip

Step one in the grip is to set the stone at either 10 o’clock or 2 o’clock (assuming 12 o’clock is the neck end of the handle pointing down the sheet) depending on if you are throwing a clockwise or counter-clockwise rotation. You should do this after you have cleaned the stone, but before you grip the stone for your delivery. Setting the rotation after you have gripped the stone can cause problems with your arm position in your delivery. So set the stone, then grip it.

Step two concerns the grip itself. Many curlers have “weird” grips. Many professional curlers have very specialized grips they have worked on over the years that can’t be imitated well without a lot of practice and experience.

I would recommend using one of two textbook grips. The first I’ll call the Canada grip (that is the one that is taught in the Curling Canada manual). The second I’ll call the Norway grip (it is more common in Europe, and is taught in the Scottish curling system).

The Canada-style grip holds the stone at the goose-neck with the thumb, index, and middle finger applying light pressure to the handle. The second set of pads of the inside fingers should be on the bottom of the handle. The wrist should be high. All the fingers should be together. The position of the hand is similar for both turns.

 
Curling grip

Curling grip

The Norway-style grip holds the stone further back (ideally thumb and index and middle finger are over the center of axis of the stone). With the wrist low and all the fingers together. As with the Canada grip the pressure is applied by the thumb, index, and middle finger. The other fingers should be close together rather than spread out.

The thumb position is different depending on the turn. For an out-turn, the thumb rests on top of the handle. For an in-turn the thumb rests on the inside of the handle. This is to create a bit of leverage on the handle using the thumb. One way of thinking about this grip is that it is similar to how you grip a key to open a lock.

Out-turn grip:

 
Out-turn grip

Out-turn grip

In-turn grip:

In-turn grip

In-turn grip

Delivery arm

During the delivery you want to have a slight bend in the arm that is holding the stone. This lets your arm function as fine tuning mechanism – so that you can add a little weight or take a little bit off if necessary during your slide. It is also very useful for having a positive release. Many curlers tend to slide with a stiff arm, thinking that this helps them hit the broom. But relaxing the arm a bit gives you a bit more slack to make any necessary adjustments during your slide.

Initiating the curl

Many curlers either begin to rotate the stone too early or too late in their delivery. The rotation should be applied gradually over the last three to four feet of the delivery (prior to letting the stone go).

A great test for this is to have two friends watch your slide. Have one person mark where you start rotating the stone (with a cone, sponge, or gripper) and have the other person mark where you release the stone. The distance between the two points should be about a brush handles length.

If it is any longer the stone tends to under rotate. If the rotation is applied in too short a distance, the stone tends to rotate too much (more on this in a sec).

Next, the bend in your arm from the slide phase now comes into play. Ideally as you are applying the curl, you also want to be extending your arm. It is important that this is not a shove (as that can send the rock offline and unnecessarily accelerate it), but that it is a gradual extension arm from bent to straight over the three to four feet of your release. This accomplishes a couple of things.

First, as soon as you leave the hack and slide, you are decelerating. The arm extension makes sure the stone leaves your hand with positive momentum. If you do the opposite and pull back on the stone as you release, that can cause the stone to slow down dramatically. The extension should be gradual. It should feel like the stone is extending your arm, rather than you are shoving the stone.

Second, the extension creates a positive follow through of the arm towards the broom. Just like a follow through in other throwing sports, the extension should help you hit your target.

One key during this phase is that you should initiate the curl first then begin the follow through as you get to the release.

Release and follow through

At this stage it is simply a matter of letting go of the stone and letting your hand follow through into a handshake position. A key thing to watch for here is what your hand does on release. If you either pull your hand back from the stone as you let it go, or the hand goes off to one side of the other, it is likely that your release is not a clean one.

Either the stone will have some momentum removed or you will have pushed the stone offline (the infamous dumped out-turn or started in-turn I talked about above). In practice, look down as you release and watch what you are doing with your hand. If at all possible, have a friend video your delivery and pay attention to you hand motions at release.

What is the difference between a “positive” release and a “soft” release

If you have followed all of the steps above, then congratulations: you have a positive release! When people talk about a positive release they are referring to two things.

First, the stone is being extended from the delivery upon release and the thrower has a clean follow through. The stone should almost pop out of the hand straight at the broom.

Second, the stone should have 3 to 3.5 rotations over the course of its delivery (assuming it is a draw to the t-line). The clean release at the broom ensures the stone is on target. The arm extension as the stone leaves the hand ensures that the stone is leaving the hand at the intended velocity. The proper application of rotation ensures that the stone will curl in a consistent manner.

One way to test if you have a good rotation on your stone is to throw a draw the length of the ice. It should complete one full rotation by the time it is half way down the ice, and at least three full rotations before it stops.

Why does it matter if you have a positive release?

A stone with too little rotation is likely to over curl. A stone with no rotation is like a knuckleball – it is completely unpredictable where it will end up. A stone with too much curl will run straighter than intended, and often go further because of the extra momentum from the spin.

Most club curlers throw a soft release, where the stone has little of no rotation, and because of this the stone picks up some lateral movement on release. This affects both the line of delivery of the stone and its velocity.

An inconsistent release leads to inconsistent shot making. It also makes it more difficult for the skip to read the ice, because the stones are behaving in an unpredictable manner. Before blaming the ice or the stones for bad play (both common scapegoats every night in the curling club lounge) take a look at your player’s releases and the rotations on the stone.